Homepage
Personalize your landing page experience by configuring the hero section, featured links, and dynamic post categories.
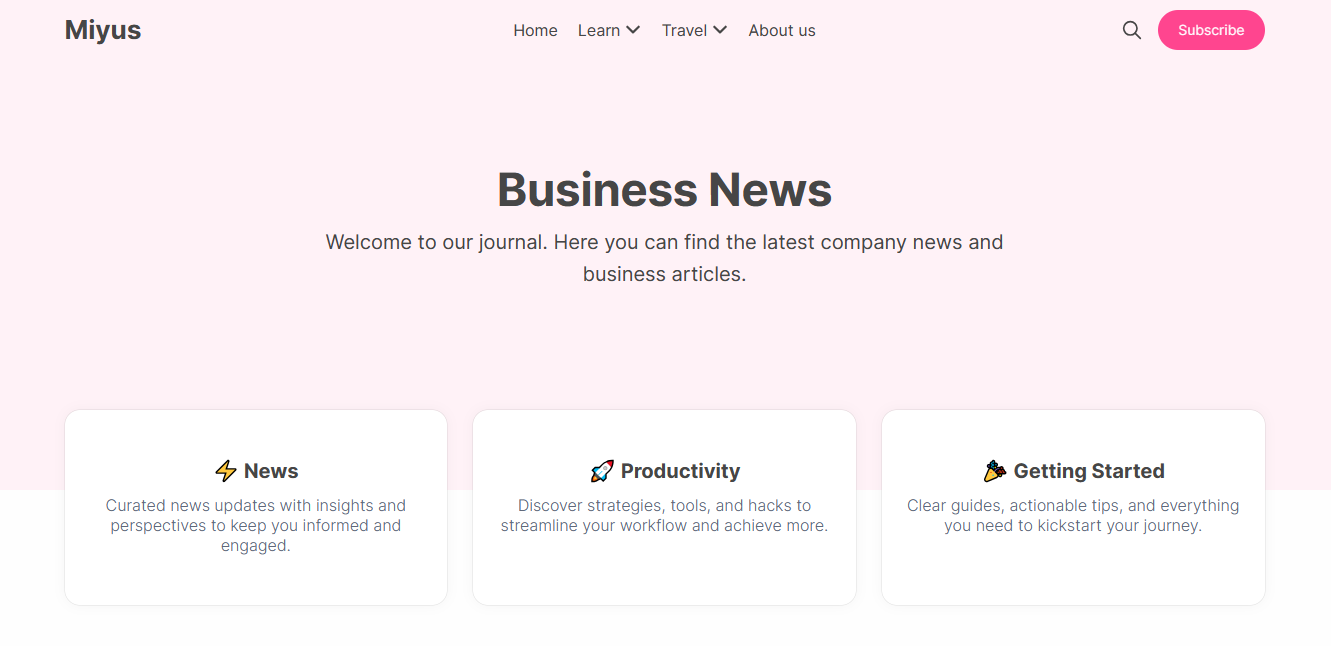
Hero Section
The Hero section is the primary call-to-action area at the top of your homepage. It consists of a title, description, and an optional newsletter subscribe form.
Customizing Content
Go to the Design & branding settings in Ghost Admin and click Customize.
Navigate to the Homepage tab.
Enter your custom text in the Hero title and Hero description fields.
Click Save to apply the changes.
Subscribe Form
You can choose to show or hide the newsletter signup form within the hero area.
Visibility Rule
To ensure a clean user experience, the subscribe form is automatically hidden for existing members.
Locate the Hero subscribe form toggle in the Homepage settings.
Switch the toggle On or Off based on your preference.
Click Save to finalize.
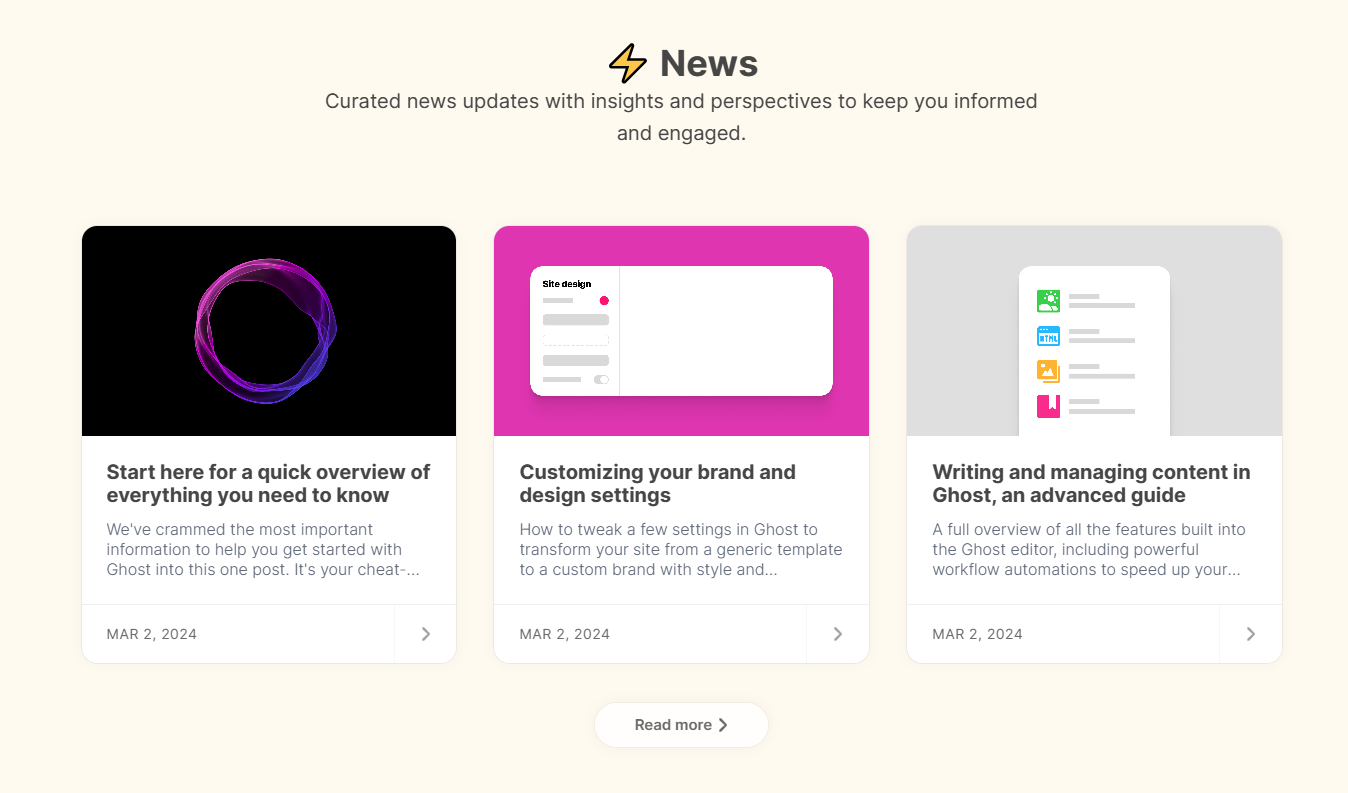
Featured Links
Directly below the hero area, you can showcase helpful links to specific pages or tags that you want to emphasize.
Identify the slugs for the pages or tags you wish to feature.
Enter the slugs into the Featured links field, separated by commas (e.g., news,getting-started,about).
Click Save to update the section.
Configuration Example
Preview
Editor's Picks
The Editor's Picks section highlights your most important content directly on the homepage. This section is dynamic and populates based on your "Featured" posts.
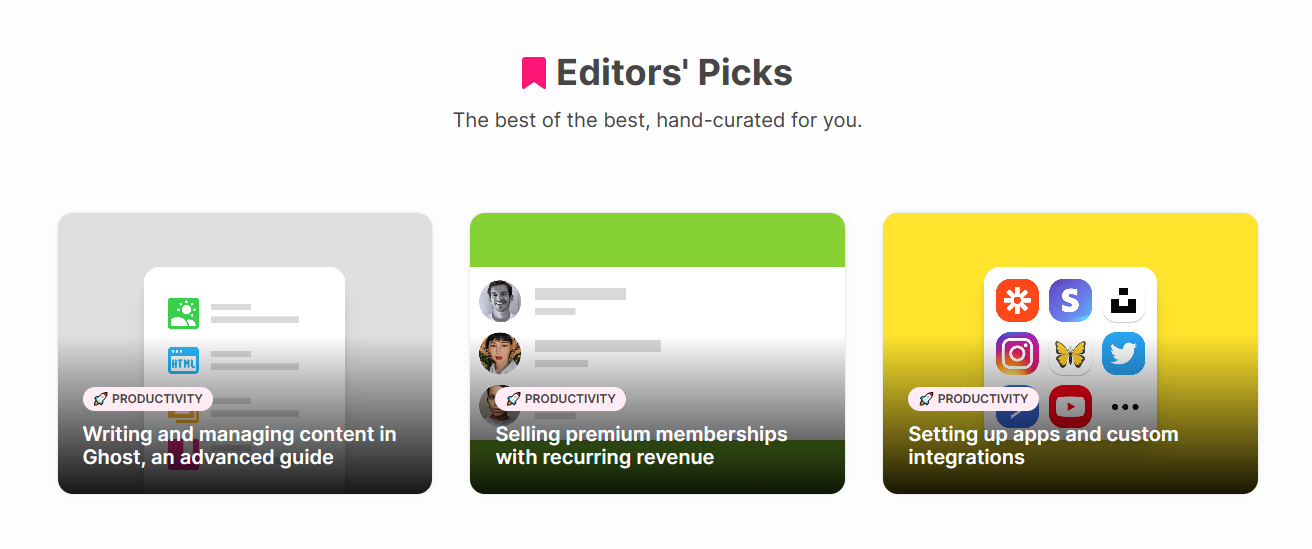
How it works
To display a post here, simply mark it as Featured in the Ghost Post Settings. If no posts are featured, this section will automatically hide itself.
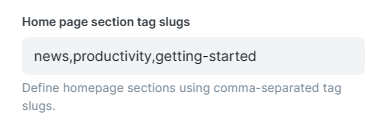
Homepage Sections
Create dynamic, tag-based categories on your homepage to group your content into logical sections. Each section displays the 3 most recent posts from that tag.
Setting up sections
In Ghost Admin, find the slugs for the tags you want to display as sections.
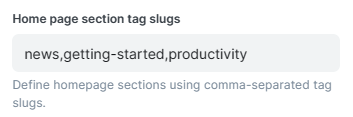
Under the Homepage settings tab, locate the Home page section tag slugs field.
Enter your tag slugs separated by commas.
Click Save to apply the changes.
Admin Configuration
Visual Preview